Lightbox
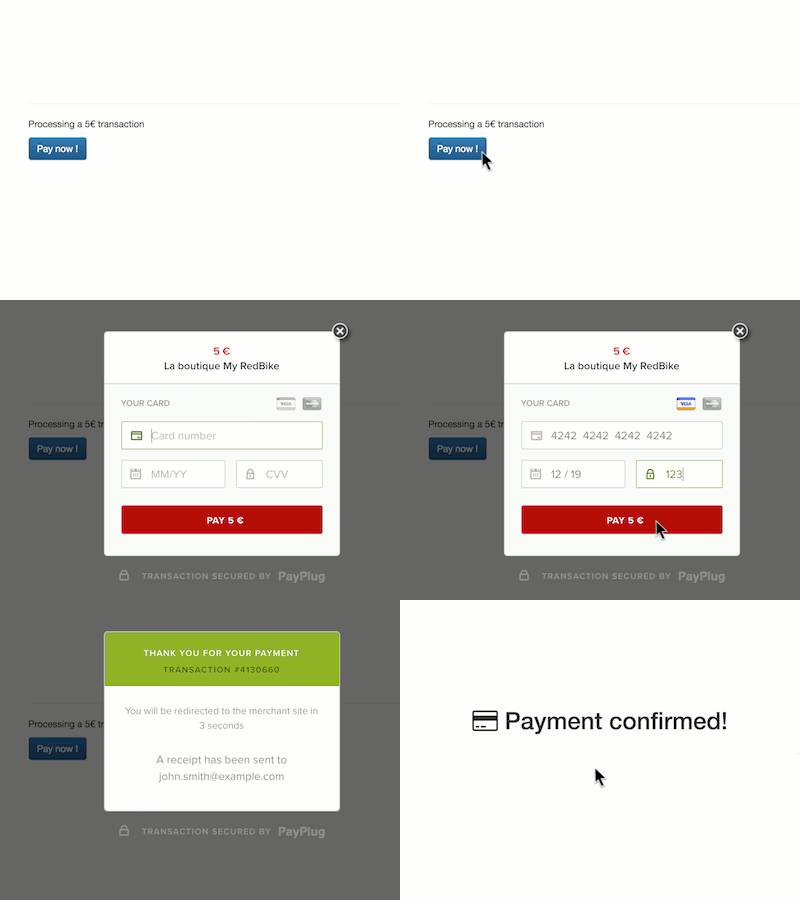
If you do not want to redirect your customers to a payment page hosted by PayPlug, the Lightbox is a quick and simple solution to add an embedded and secure payment form into your website.

This is the easiest way to integrate a PayPlug payment form, as you do not need to handle the security aspect of your customers’ card data.
If you are looking for a full customised payment form, you can create your own payment form with Integrated Payments.
Create a payment page
<?php
$payment = \Payplug\Payment::create(array(
    'amount'         => 3300,
    'currency'       => 'EUR',
    'save_card'      => false,
    'billing'          => array(
        'title'        => 'mr',
        'first_name'   => 'John',
        'last_name'    => 'Watson',
        'email'        => 'john.watson@example.net',
        'address1'     => '221B Baker Street',
        'postcode'     => 'NW16XE',
        'city'         => 'London',
        'country'      => 'GB',
        'language'     => 'en'
    ),
    'shipping'          => array(
        'title'         => 'mr',
        'first_name'    => 'John',
        'last_name'     => 'Watson',
        'email'         => 'john.watson@example.net',
        'address1'      => '221B Baker Street',
        'postcode'      => 'NW16XE',
        'city'          => 'London',
        'country'       => 'GB',
        'language'      => 'en',
        'delivery_type' => 'BILLING'
    ),
    'hosted_payment' => array(
        'return_url' => 'https://example.net/success?id=42',
        'cancel_url' => 'https://example.net/cancel?id=42'
    ),
    'notification_url' => 'https://example.net/notifications?id=42',
    'metadata'        => array(
        'customer_id' => 42
    )
));
The Lighbox is based on the PayPlug API. To integrate the payment form, first you have to create a simple payment request based on the create payment method.
Include form.js
<script type="text/javascript" src="https://api.payplug.com/js/1/form.latest.js"></script>
To integrate the Lightbox you need the script tag located on the right side. Add this script tag in your code that will serve the payment form.
Call the Lightbox
document.addEventListener('DOMContentLoaded', function() {
  [].forEach.call(document.querySelectorAll("#signupForm"), function(el) {
    el.addEventListener('submit', function(event) {
      var payplug_url = '<?php echo htmlentities($payment->hosted_payment->payment_url); ?>';
      Payplug.showPayment(payplug_url);
      event.preventDefault();
    })
  })
})
In order to display the PayPlug lightbox into your page once your customer clicks on the pay button, add into your code the javascript script from the right side.
Full example
Page index.php with the payment page based on Bootstrap:
<?php
$secretkey = 'sk_test_9898098098guGYUG9';
$email = 'john.watson@example.net';
$first_name = 'John';
$last_name = 'Watson';

require_once('payplug-php/lib/init.php');
\Payplug\Payplug::setSecretKey($secretkey);

$payment = \Payplug\Payment::create(array(
    'amount'         => 100,
    'currency'       => 'EUR',
    'billing'          => array(
        'title'        => 'mr',
        'first_name'   => 'John',
        'last_name'    => 'Watson',
        'email'        => 'john.watson@example.net',
        'address1'     => '221B Baker Street',
        'postcode'     => 'NW16XE',
        'city'         => 'London',
        'country'      => 'GB',
        'language'     => 'en'
    ),
    'shipping'          => array(
        'title'         => 'mr',
        'first_name'    => 'John',
        'last_name'     => 'Watson',
        'email'         => 'john.watson@example.net',
        'address1'      => '221B Baker Street',
        'postcode'      => 'NW16XE',
        'city'          => 'London',
        'country'       => 'GB',
        'language'      => 'en',
        'delivery_type' => 'BILLING'
    ),
    'hosted_payment' => array(
        'return_url' => 'https://example.net/success',
        'cancel_url' => 'https://example.net/cancel'
    ),
    'notification_url' => 'https://example.net/notifications'
));
?>

<!DOCTYPE html>
<html lang="en">
<head>
<title>PayPlug Lightbox example</title>
<meta charset="utf-8">
<meta name="viewport" content="width=device-width, initial-scale=1, maximum-scale=1, user-scalable=no">
<link rel="stylesheet" href="https://maxcdn.bootstrapcdn.com/bootstrap/3.3.5/css/bootstrap.min.css">
<link rel="stylesheet" href="https://maxcdn.bootstrapcdn.com/bootstrap/3.3.5/css/bootstrap-theme.min.css">
<script src="https://ajax.googleapis.com/ajax/libs/jquery/3.6.4/jquery.min.js"></script>
<script src="https://maxcdn.bootstrapcdn.com/bootstrap/3.3.5/js/bootstrap.min.js"></script>
<link href="//netdna.bootstrapcdn.com/font-awesome/4.4.0/css/font-awesome.css" rel="stylesheet">
<script type="text/javascript" src="https://api.payplug.com/js/1/form.latest.js"></script>
<script type="text/javascript">
  document.addEventListener('DOMContentLoaded', function() {
    [].forEach.call(document.querySelectorAll("#signupForm"), function(el) {
      el.addEventListener('submit', function(event) {
        var payplug_url = '<?= $payment->hosted_payment->payment_url ?>';
        Payplug.showPayment(payplug_url);
        event.preventDefault();
      })
    })
  })
</script>
</head>
<body>
  <div class="container">
    <div class="row">
      <div class='col-md-12'>
        <h1><i class="fa fa-flask"></i> PayPlug Lightbox example</h1>
        <hr />
        <p>Welcome,</p>
        <p>This example is creating a payment of 1€.</p>
      </div>
      <div class='col-md-4'>
          <form action="" method="post" id="signupForm" class="formulaire" novalidate>
            <p>
              <button type="submit" class="btn btn-default">Buy now</button>
            </p>
          </form>
      </div>
    </div>
  </div>
</body>
</html>
Try this example to see how all the elements described in this documentation work together. Be sure to replace the $secretkey value with yours before testing.

